Szolgáltató adatai Help Sales ÁSZF Panaszkezelés DSA

Baby Blankets for Fall: Knit vs Crochet

As the fall season is here and the air gets colder, there's nothing better than cozying up with a cute, beautiful baby blanket. It is a fun and versatile project to work on. You will find immense joy when you see a baby snuggled in one. Whether you choose crochet or knit, you can easily create a baby blanket and a perfect fall project. For this amazing project, you need soft yarn and knitting needles or crochet hooks. But which method is the best one? Should you knit or crochet baby blankets? Let’s discuss this in this blog.

As you know, the choice between the two techniques depends on the type of baby blanket you want to make, skill, time, and preference.

Let’s break down this into small steps:

Step 1: The blanket size

Baby blankets are available in different sizes; therefore, before you start your project, decide on the blanket size.

However, there are some common sizes that you can check.

  • The standard baby blanket size is 36 in x 36 in.
  • Swaddle: 48 in x 48 in.
  • Throw blanket: 52 in x 60 in.

Step 2: Make sure you have the best yarn

Cotton and wool are the popular choices among crafters for baby blankets. As you know, the yarns are made in different styles classified by weight or the thickness of the strands. The outcome depends on the fabric and drape of the baby blanket. If you plan to knit, you need a softer and more delicate yarn that is ideal for wrapping the baby. Due to the stretchy fabric, you get additional comfort.

If you decide to crochet, you need a thicker, more textured fabric. The density of the fabric adds warmth and creates interesting designs, based on the design you choose.

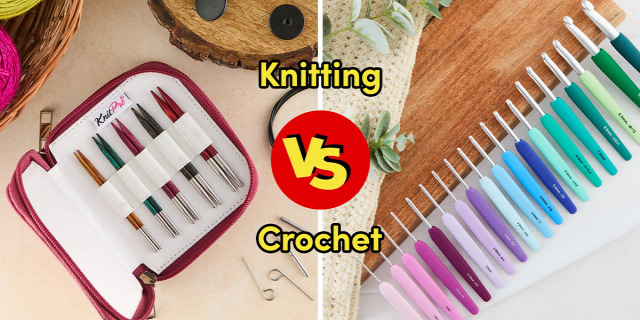
Step 3: Decide between knitting needles or crochet hooks

Knitting needles come in various ranges from US 0 to US 20. Most of the yarn labels mention the needle size; it always depends on the yarn. We recommend that beginners or advanced knitters choose circular knitting needles so that the weight of the blanket can be distributed on the cord.

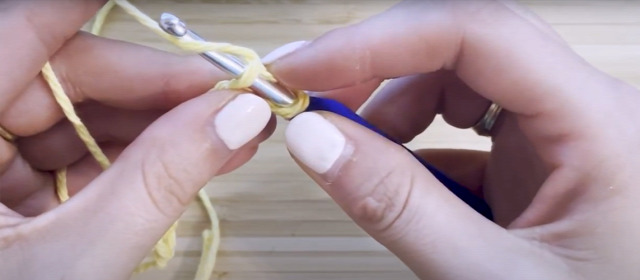
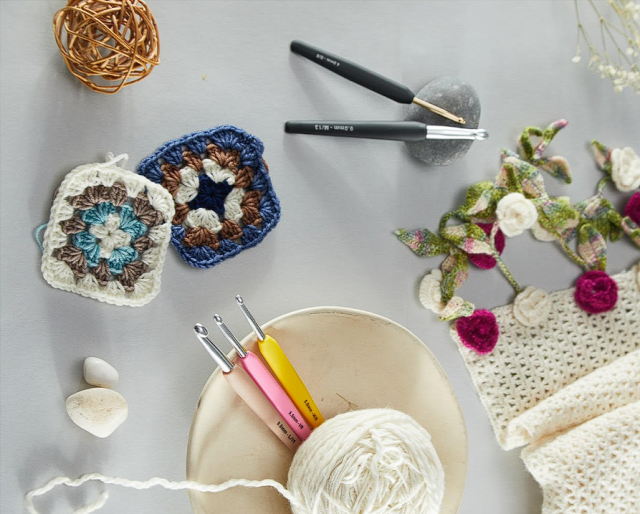
Crochet hooks come in different sizes, so you can pick any hook for your project, as long as you are comfortable with the tool. You can choose single-ended crochet hooks for the project or Tunisian ones. But if you decide to use an Interchangeable Tunisian crochet hook, it works as a regular hook but when you attach the cord, it is the best tool for Tunisian crochet stitches.

Step 4: A warm baby blanket stitch pattern

A baby blanket can be worked with any simple to textured stitch patterns. Explore our guide on Quick and Easy Knitting for Babies and Toddlers for some cozy stitch patterns.

  • Once you know knit and purl stitches, you can master any other basic stitch. When combining the stitches, you can easily create a diverse range of patterns and textures such as stockinette stitch, garter stitch, and rib stitch.
  • There are various crocheting stitches, such as chain (ch), single crochet (sc), double crochet (dc), slip stitch (sl st), and treble crochet (tr). The combination of different stitches helps in making more intricate patterns.

What have you decided- knit or crochet?

Both knitting and crocheting create stunning and fantastic baby blankets. However, which one to choose depends on a few factors:

  • If you’re looking to save time and want to make a quick project, crochet is the way to go.
  • Moreover, for a smoother finish, opt for knitting.
  • Furthermore, if you prefer a blanket with bold textures, crochet is your best friend.
  • For beginners, crochet is easy, and if you are ready to take up a challenge knitting offers endless opportunities.
  • If you are looking to develop your skills, go for knitting.
  • Crochet uses more yarn compared to knitting in that case, you need to buy more skeins of yarn.

Whether you plan to knit or crochet your fall baby blanket, the most important thing is to enjoy the process of doing it. As you know, both techniques offer unique advantages, and the result is a cherished, handmade gift that keeps little ones warm as the temperatures drop.

Tovább

How to Yarn Over in Crochet for Beginners

Crochet is a versatile craft technique that uses hooks and allows you to create different items. In truth, it is a popular hobby for many people. When you start learning crochet, you will come across various technical terms in crochet. One of the terms is “yarn over.” “Yarn over” is often abbreviated as “YO” in US crochet and “YOH” in UK terminology to know more about US & UK Terminology. It involves wrapping the yarn around the crochet hook to create a new loop. You’ll be glad to know that in this blog, we will explore all the basic steps required to master this technique and why and when we can use it.

Let’s try to understand the concept of yarn-over.

What do you understand by yarn-over?

Yarn-over is the fundamental technique, where you put the hook below and behind the working yarn. It creates an additional loop used to make various stitches. Understanding and mastering the great technique is important to create different patterns and designs in the project. Without it, you can’t create a loop to build your project.

Do you follow us so far? Great! Let’s discuss more about yarn-over.

Why is the yarn-over technique used?(H3)

It is the foundation technique in crochet. In addition to that, once you become a master in this technique, it will open endless possibilities.

The following purposes are served by yarn-over:

  • The purpose of yarn-over is to increase the number of stitches in a row, which was earlier not there.
  • Most importantly, it creates holes and gaps in the fabric.
  • Additionally, it is used to create decorative stitch patterns such as lacework or eyelets.
  • It increases the height and space in crochet projects.

Which crochet hook to choose? 

Before we jump into the details of crochet hooks, we recommend a hook that matches the size of the yarn and is easy to hold. Here are some points you can consider:

  • Yarn-over can be easily done using crochet hooks like a single-ended crochet hook, which provides a smooth and snag-free experience.
  • Moreover, as a beginner, you can also experiment with wooden crochet hooks because they are better for slippery yarn. These are lightweight and easier to hold.
  • Tunisian Crochet Hooks come with an elongated hook that holds multiple stitches. The hook is available in various cord lengths and is ideal for projects like blankets and scarves.

What materials are required?

  • Yarn
  • Crochet hook

How do you yarn over in crochet?

You can follow these simple steps and learn the basic yarn-over technique:

Step 1- Start with a slip Knot that is easy to make.

Step 2- With your index finger, slide the slip-knot onto the shaft of your crochet hook (Note: the shaft is between the head and grip of the crochet hook).

Step 3- Using your yarn hand in which you hold a yarn, hold the tail of the slip knot between your thumb and forefinger.

Step 4- Use your index finger (next to your thumb) and bring the working yarn up behind the hook.

Step 5- Lastly, place the yarn over the shaft, between the slip knot and the throat (below the head of the hook), with the yarn pulled towards you.

We hope you understand the technique, so start practicing this over motion until you are comfortable with it. After completing the yarn-over process, continue with the regular stitching.

Note: Don’t wrap your yarn from front to back; it should always be from back to front.

How do you make multiple yarns over crochet? 

Once you have learned the basic yarn-over technique, you can move to the next ladder, making multiple yarns over.

Step 1- With your yarn hand, pick up the yarn between your index finger and the middle finger. Bring the yarn up behind the crochet hook. Then, move it forward and lay it around the shaft of your crochet hook.

Step 2- Do not drop the yarn. To create the second yarn-over, move your hand behind the crochet hook. Then, lay the second yarn over on the crochet hook shaft.

 Step 3- Repeat the 2nd step to make more yarn-over. Otherwise, continue with the stitching.

After becoming perfect in a yarn over technique, it will be easy for you to start your beautiful journey with the crochet. As a beginner, don’t worry about crochet hooks.

In a nutshell, we have shared all the techniques and steps so that you can master the yarn-over technique. The skill in yarn-over opens endless possibilities to create unique patterns and designs. Are you interested in learning this amazing technique?

Do you want to learn more patterns?

Ultimately, crochet is a wonderful craft! You can play around with materials, colors, and stitches.

Do you like KnitPro blogs? If so, please read a similar blog here.

Tovább

How to Join Yarn with the Magic Knot

Do you feel sad when your yarn ball gets over? And worry about how to connect two yarn balls? Whether you knit or crochet, you face the same situation every time. For an experienced person, it won’t be a problem. But for beginners, it would be a cumbersome task. Suppose you are creating a project with a knitting needle, and you suddenly stop because your yarn ball is over; during that circumstance, you need to connect the new yarn ball. Don't worry; we are here to help you; keep reading the entire blog, and you will understand the whole process of joining yarn with the magic knot.

Let’s look into the details and get the perfect magic knot.

What is a magic knot? 

A magic knot is simply joining the two pieces of yarn together for crocheting or knitting. It is also known as an invisible or fisherman’s knot.

What materials are required? 

  • Working yarn and a new yarn (use any yarn, but the weight and fiber must be similar to get the best results).
  • A pair of scissors.


Want to know more about it? Then, just go on.

What is the procedure for tying a magic knot?


Now comes the significant part! The method is easy, and you won't find any problems. In this technique, you will tie two overhand knots close to each other. It is versatile and innovative.

Here are a few steps to follow

Step 1: First, lay the end of the first working yarn horizontally over the second yarn, creating a cross-like structure.

Step 2: Ensure that the ends of the yarn are positioned neatly.

Step 3: With the first yarn, make a loop around the second yarn. Hold the yarn tightly and wrap it around from the bottom.

Step 4: Now, wrap the second non-working yarn around the first working yarn and make a similar loop.

Step 5: Smoothly pull both the yarn simultaneously to tighten the loops around each other.

Step 6: Lastly, carefully cut any extra leftover yarn.

Tips for a neat join 


Before we go any further, let’s check out some tips to get a perfect join.

  • For a smoother transition, ensure that both yarns are of similar thickness.
  • Maintain the right balance between the two yarns, which are neither tight nor loose.
  • If the yarn is thicker, you may need to make a larger loop.
  • Make the process easy so that you can remember it.
  • Use delicate yarn carefully to avoid splitting or breaking.
  • It would be better to place the knot in an invisible position for a better look.
  • Beginners must practice regularly before applying it to the main project.

When to use a magic knot? 

You must know when to use a magic knot to avoid disturbance in your project.

  • During the project, you need to join two different colors of yarn.
  • To join a new yarn in case you run out of yarn.
  • When working on a big project, you have to join multiple yarns.
  • When using heavenly patterns, where the knots won’t show like a garter stitch.

When not to use magic knot?  

There are some situations where you can’t use magic knots, and it would be best not to use them in your project:

  • Stockinette stitches are too smooth for the magic knot. Due to its smoothness, there is no guarantee that they will stay in the right place.
  • It won’t be too great for a single-color yarn because it's difficult to get the knot exactly in the correct position so that the colors seamlessly flow from one to the next. You will face the same issue with the color yarn as well.
  • When working with yarn that breaks easily, be careful while pulling the two yarns together.
Tovább

A Beginner’s Guide to Stitch Holders in Knitting and Crochet Projects​​​​​​​

Stitch holders are essential crafting accessories that every knitter must own. As the name suggests, they are tools used in knitting and crocheting to hold stitches. These stitches are generally live stitches that need to be removed from the knitting needles or crochet hooks to work on them later. To explain better, for example, you are working on a knitting or crochet pattern, and there comes a step in the pattern that requires you to hold stitches temporarily for later use. Here, you will need assistance with the handy stitch holders.

In projects, whether you knit or crochet, stitch holders come in handy when you need to shape the neckline of a sweater or armholes for garments or prepare for the Kitchener stitch for shoulders or socks. As the live stitches stay secure, you do not have to worry about those unfinished loops and continue with the stitches you have in hand.

Though stitch holders are lifesavers, they aren't hard to use. In this blog, we'll explore stitch holders in detail.


What are Stitch Holders? (H2)

Stitch holders come in many sizes. They look like safety pins and have a snapping end that does not let the stitches drop or come undone.

Small yet mighty crafting accessories are readily available in yarn shop displays or your favorite online stores. When you step into garment making—sweaters, cardigans, or tees—you will work with them more. As the name says, stitch holders hold stitches aside securely for a portion of your project. You'll commonly see pattern directions telling you to use a stitch holder with instructions on how many stitches to hold and when and how to return them to the knitting pattern.


When to Use Stitch Holders? (H2)

Generally, knitting or crochet patterns instruct when to use stitch holders. But, if you are working on your own design, you will need stitch holders anytime you want to secure live stitches that you will work on later. They serve design and functionality.

  1. To Shape Armholes and Necklines (H3)

Knitted or crocheted garments such as sweaters, cardigans, or tees have armholes and necklines that are worked separately from the main section. In these situations, stitch holders become lifesavers as you can hold the stitches for the neckline or sleeve openings while working on the body of the garment, seamlessly picking them up later to join the pieces.


  1. To work on thumb sections of Gloves and Mittens (H3)

In projects such as gloves and mittens, you work separately on the thumb and finger sections. Stitch holders are handy here, too, to keep your live stitches secure while you complete the rest of the project.


  1. Creating Buttonholes (H3)

For knitted or crocheted garments that require functional buttonholes, stitch holders allow you to cast off a specific number of stitches and hold them live, creating a gap for the button to go through.


  1. Cable Patterns (H3)

Cables are intricately twisted stitches made with out-of-turn stitches. While knitters reach for cable needles, stitch holders keep the live stitches secure so that they can be worked on later.

Once you have your trusty stitch holders, you can start including them in your knitting and crocheting routine.

Here are some helpful tips:


Go through the Knitting or Crochet Pattern: Read your pattern carefully to understand when and how to use stitch holders and the number of stitches to be held.


Picking Up Stitches: When you need to return the held stitches, knit or crochet them back onto your working needle one at a time. Pay attention to maintaining the correct stitch order, especially when working armholes.


Choosing the Right Size of Stitch Holders: The size of the stitch holders you need depends on how many stitches need to be moved to them and how big they are depending on the yarn (e.g., fingering weight yarn or bulky weight). 


Alternatives of Stitch Holders (H2)

If you're stuck on a project and don't have a stitch holder handy, you can accomplish the same task by using some waste yarn, a bit of extra yarn you're not using) or even dental floss to hold onto the stitches. The advantage of stitch holders, though, is the security of holding the stitches and keeping them closed.

If you are working with KnitPro interchangeable circular needles or sets, a cable can manage the task of stitch holders, but you need to secure the stitches with end caps. Another handy help is that KnitPro interchangeable circular knitting needles come with a lifeline hole where you can thread yarn or floss and keep the stitches secure.

Now that you know the fantastic benefits of working with stitch holders, get yourselves the best from KnitPro. Our aluminium stitch holders come in a set of 3 in different sizes in vibrant colors. So, are you ready to enhance your crafting with stitch holders?

Tovább

Why Your Child Should Learn to Crochet?

Do you want to teach your children to crochet? But are you unsure whether you should introduce them to crochet hooks or not? Let us guide you through some amazing reasons why you must teach your children to crochet. In this world of digital screens, children are losing their creativity and skills; therefore, crochet for children is essential. The craft is for more than just grandmas; even the young ones can learn it. First of all, it is a wonderful craft that lets you express creativity, and children have such great imaginations that they can create wonders. Secondly, it is a way to do a wonderful project with their hands, boosting their confidence and keeping negative emotions at bay. Plus, it is excellent to learn about sustainable crafts.

To help you decide, we’ll explore other reasons for teaching children to crochet in this blog.

  1. They develop fine motor skills and hand/eye coordination.

Fine motor skills and hand-eye coordination are bonus points earned with crochet. Whether your child is right or left-handed, both hands are utilized with each stitch. At the same time, children will learn to hold their single-ended crochet hooks in one hand and wrap yarn with the other. While the hand with the hooks moves back and forth to grab the yarn, the yarn is held with steady tension. Stitch-making movement helps build fine motor skills and hand-to-eye coordination. It is recommended that younger kids learn to finger crochet and then move to using a hook later. From basic stitches to textured patterns they expand skills while honing motor skill and co-ordination.

  1. Get better at Math

Crochet is not just crafting; it includes maths and analytics. The math skills include all kinds of numbers: stitch count, row count, and within a stitch count. A crocheter counts the loops to insert the crochet hook to make stitches, plus run into increasing and decreasing rows to make a pattern bigger or smaller. Besides enhancing math skills crochet also teaches the importance of precision and planning. So, you keep track of

Further lessons on math skills are acquired when you learn how to measure and determine the gauge of a project to make sure it will fit. Supply them with tape measure or could also take help of a row counter. A ring row counter is a good accessory for children and flaunt their status as makers. Plus, there are many adorable designs of measuring tapes that create interest in young makers.

  1. Develop focus and attention to detail

One of the skills children learn with crochet is to develop focus in stitch making and pay attention to detail. While you focus on yarn tension with one hand you pay attention to making loops for chain or single crochet (SC), double crochet (DC) and treble crochet (TR). The focus and attention are a habit that works for all of us in all aspects of life. This works for studies, sports and other activities.

  1. Explore Art and design

When you think of art, crochet is a craft that transform a simple string of yarn and create something beautiful. Children learn to imagine and put them in design. From a basic scarf to customized sweaters, Amigurumi toys to home décor they can work with any yarn fiber, weight or shade to create something spectacular.


  1. Learn About Love, Charity and Compassion

If you want children to learn about love, charity and compassion, a good way is through their crochet hooks. Everyone feels loved when a handmade gift is presented to them.  For gifts to grandparents, cousins or friends, crochet comes handy as the gifts are personalised reminder of the love and hard work.

For charity, they can make projects and donate to charities. Scarves, blankets or pillows for homeless people, preemies, hospital patients, nursing home residents, and more. With each project they make they learn about compassion and how they brough smile and warmth to a stranger with their handiwork.

So, are you convinced to teach your children to crochet? Now, get started with your lessons. Explore KnitPro for beginner-friendly crochet hooks and accessories. Choose smooth bamboo hooks or work with wood. You can also work with ergonomic crochet hooks such as Waves with rubber handles or choose Oasis interchangeable hooks that come with an option of one handle and multiple hooks. Choose individual sizes or explore crochet hook sets along with crochet accessories.

Tovább

knitpro

blogavatar

Phasellus lacinia porta ante, a mollis risus et. ac varius odio. Nunc at est massa. Integer nis gravida libero dui, eget cursus erat iaculis ut. Proin a nisi bibendum, bibendum purus id, ultrices nisi.

Utolsó kommentek