Impresszum Help Sales ÁSZF Panaszkezelés DSA

The 6 Fastest Crochet Stitches

The desire to expedite project completion is a common thread among crocheters of all skill levels. The prospect of completing projects faster is always appealing. To make the crochet process swift, various stitch types can benefit everyone, regardless of their skill level. Keep on reading for an in-depth exploration of the fastest crochet hook stitches.

Easiest and Quickest Crochet Stitches

  1. Double Crochet (dc)

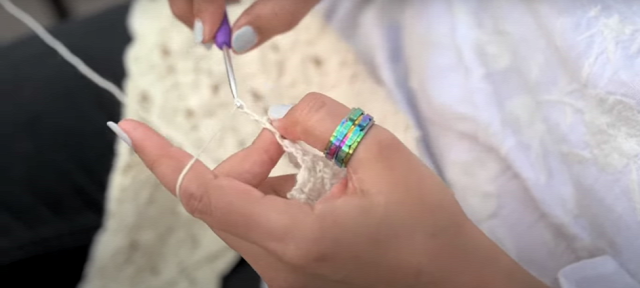
Undoubtedly the champion of celerity, the double crochet stitch whips up a medium-weight fabric at lightning speed. Each double crochet uses just two loops on your crochet hook, minimizing the manipulation and maximizing speed. With DC, you can craft scarves, amigurumi toys, and many more things with the help of single ended crochet hooks .

  1. Half Double Crochet (hdc)

The hdc emerges as a close contender in the swift crocheting genre. It employs three loops on the hook, resulting in a slightly denser fabric compared to the double crochet. While marginally slower, the hdc offers advantageous structural integrity for projects requiring quality. Hdc is frequently used in crocheting scarves, beanies, and sweaters with the help of double ended crochet hooks or any other hooks. It works pretty quickly making it a good crochet stitch for making blankets as well.

  1. Treble or Triple Crochet (tc)

For crocheters seeking to outpace their previous efforts, tr crochet beacons truly. Tr utilizes three loops on the hooks, taller than dc, it covers more ground with each stitch, making rows fly by.

  1. Granny Stitch

Don't let the name fool you—granny squares can be surprisingly fast. These colorful squares use basic double crochet stitches and come together in a jiffy, even for beginners. Since this stitch is versatile, you can try this even on a Tunisian crochet hook .

  1. Moss Stitch

A paragon of simplicity, a moss stitch entails a single-row repeat of single crochets worked exclusively in the back loop only. This stitch yields a delightful textured fabric and accumulates quickly.

  1. Mesh stitch

Since it's so lightweight, it's a great crochet stitch to work up and perfect for summer blankets. The mesh stitch allows for lightweight crocheting, speeding up project completion. It's super friendly for beginners and uses only basic crochet stitches such as single crochet and chain stitch. Just grab a yarn and a suitable crochet hook and start crafting your stunning summer projects with this airy stitch type.

Helpful Tips to Master the Crochet Speed

Optimize hand and hook movement: Employ a relaxed and firm grip on the crochet hook, potentially experimenting with the lower hold for enhanced dexterity. Focus on creating smooth, consistent motions during stitch execution, aiming for uniformity in time spent per stitch.

Maintain Yarn Management: To minimize yarn interruption, use yarn from the center of a ball to prevent snags. Consider using a yarn bowl for additional control and to deter tangles.

Choose Appropriate Tools: The crochet hook size should be carefully chosen to complement the yarn weight being used. A well-matched hook size facilitates efficient yarn manipulation.

Maintain Good Posture: Good posture is also vital during crocheting. If possible, take adequate back support, as this prevents fatigue and allows for longer crafting sessions.

Reduce color shifts: Changing the color takes time because additional ends need to be cut and woven in. Look for a pattern with few or no color changes if you need to finish the job quickly.

Practice the Stitch: Yes... it's the most valuable tip for so many reasons. If you have previously worked up with the stitch, you are more likely to work it up quickly. But if you are trying a new stitch, you need to fit it into your muscle memory. You will be more adept at a stitch the more comfortable you are with it. Also, it enhances your tension, which gives you a more professional look.

Now that we have come to the end of this blog, you must be familiar with the fastest stitch types and helpful tips. Try them out and become a crochet pro.


Tovább

Easy Crochet Projects for Summer

Are you looking for fun crochet patterns for summer? Then, get ready to be inspired for the season. Just bring your favorite  crochet hooks  and yarn along. You can get started on quick and easy projects with basic crochet stitches - chain, single crochet, half double crochet, and treble crochet stitches.

You may work with patterns for your summer crafting, but for many easy crochet projects, you can easily plan one on your own. To get started, gather your supplies.


  1. Yarn -  Summery yarns make your crafting sessions fun. Now, what do we mean by summery yarns? Bright colors, light weights, and breathable fibers give your yarn a summery feel. For yarn, you can get a single skein of your favorite shade in DK weight or use your yarn stash for a colorful project. Make sure you have the right crochet hook size matching the yarn weight. The yarn label or pattern instructs the right size, but if you are planning your design, the bigger hook sizes make bigger stitches, while smaller hook sizes make smaller stitches.


  1. Crochet Hooks— You will need  single-ended crochet hooks  in any material that you prefer. Bamboo and wood are beginner-friendly, but you can also work with aluminum and stainless steel. If you own a Tunisian crochet hook , you can still use it for your regular crochet project but don't attach the cord. 

Now, let's take a look at the five easy crochet patterns that are perfect for the summer:

Summer Top

Make yourself a breezy summer top using lightweight yarn like cotton or linen. Look for patterns that use simple stitches and have minimal shaping. Tank tops or loose-fitting tunic-style tops are popular choices. If you want to plan your own design and it is your first time doing so, make squares of fabric with double or treble crochet stitches then seam out a top for the warm weather.

If you have too many summer tops, create a shrug or a light cardigan for the breezy days.

Beach Bag

Create your stylish beach bag using a simple crochet stitch pattern. Choose a durable cotton or jute yarn for a sturdy bag. You can add colorful stripes or embellishments for a personalized touch. Knowing how to crochet a classic granny square opens up a world of prospects. You can work on squares individually and then sew them together with tapestry needles to make a bag. If you want a tote bag, then you need to work on the foundation first.

Sun Sat

Protect yourself from the sun while looking fashionable with a crocheted sun hat. Use a breathable yarn like cotton or a cotton blend. There are various patterns available, from basic designs to more intricate lace patterns. You can plan your design by working on a magic circle and then expanding the circle to fit your head.

Water Bottle Holder

Stay hydrated on your summer adventures with a crochet water bottle holder. This pattern typically uses a combination of basic stitches and creates a strap to hang the holder on your shoulder or backpack. If you want a fun pattern, the granny squares work out wonderfully.

Sandals

The perfect accessory to your summer outfit, you can easily crochet sandals or flip flops. Botties – the easy-to-work-with soles from KnitPro makes your DIY project accessible. Crochet yourself stylish footwear for the season. You can enjoy comfortable shoes for home or style them for a beach outing. The soles are easy to work with and even a beginner crocheter with knowledge of basic crochet stitches can successfully work with them.

Dishcloth

Practical and quick to practice your tension and stitch consistency, dishcloths are easy patterns. Crochet a small square or rectangular dishcloth using basic stitches like single crochet or half double crochet . If you have a stash of yarn, this one allows you to make it into a functional design. Any textured stitches or dishcloths are handy projects, even for new stitches. Forgiving of mistakes and quick to make, get started with the beginner-friendly project. Don't stop at one; you can efficiently work a pair or dozen quickly and easily.

Remember to choose yarn and hook sizes appropriate for the project and follow the pattern instructions carefully. Explore KnitPro for crochet hooks in wood, bamboo, stainless steel or aluminum. Single-ended hooks are used for regular crocheting; Tunisian crochet are specialty tools for Tunisian crocheting, while the double ended crochet hooks are tools with two sizes on either end.

Enjoy your summer crochet projects!


Tovább

How to tie a Slip Knot – Step by Step Guide for Knitters

The slip knot is the first stitch of your knitting projects. Crochet too has the slip knot. The knot on your knitting needle is the same no matter how you make it in different ways. Slip knots are counted as the first cast-on stitch on the knitting needle unless mentioned otherwise by a pattern designer. You anchor the yarn to the knitting needle with the knot and then begin the other steps of knitting. In this tutorial, you will know how to tie a slip knot. With practice and with the completion of projects, you won’t even notice your slip knot as you will know to make one intuitively! So, let’s get started. 

Gather your knitting needles and of course yarn. The slip knot is the same, whether you work on a pair of single-pointed or circular knitting needles. Even for working on a pattern in the round of double-pointed needles, you need to make a slip knot on one of the five needles of the set. Most importantly the slip knot is the same even for a crochet hook.

Remember for slip knots, you don't need to measure the yarn precisely, but it is always recommended to keep enough extra yarn to work with. You can later cut it short. But many times, especially for the long tail cast method, this extra length will assist with casting on the stitches.

Make a slip knot following these steps

Step 1 - Pick up the yarn roughly 10 - 12cm from the end. Pinch it between your fingers and let it drop down into a U-shape also known as bight. 

Step 2 - Twist your fingers clockwise or in a way to make the yarn cross over and form a loop.

Step 3 – Place two fingers inside the loop and expand while keeping the shape of the loop intact.

Step 4 - Grab the working yarn (the one leading to your yarn ball or skein) and pull a few inches of yarn partially through the loop. The yarn you pulled must now form a bight (the U-shaped bend). One end of the yarn is shorter and is called the tail while the one leading to the ball or skein will take you through the next steps.

Step 5 - The loop now looks like a knot. Make sure to tighten by pulling both ends of the yarn. Do not cinch the whole thing down yet. Just make sure that the loop is looking a bit like a noose.

Step 6 - Now slide the loop onto your knitting needle. Now pull both ends of the yarn tight.

You can follow these steps or try the method of feeding a loop into a loop or then tightening it on the knitting needle. Another method that knitters use is making a loop and then pushing it on the needle.

A slip knot easily tightens and loosens. For your beginner projects try and make the slip knot on two knitting needles of the same size or different sizes for a stretchy cast-on.

While the steps may seem difficult when you are reading it, when you are making your slip knot on your knitting needles, you get it done within seconds.

Tovább

knitpro

blogavatar

Phasellus lacinia porta ante, a mollis risus et. ac varius odio. Nunc at est massa. Integer nis gravida libero dui, eget cursus erat iaculis ut. Proin a nisi bibendum, bibendum purus id, ultrices nisi.

Utolsó kommentek